1.基本信息配置
基本信息包括:博客标题.作者.描述.语言等等。
打开 站点配置文件 ,找到Site模块
title: 标题
subtitle: 副标题
description: 描述
author: 作者
language: 语言(简体中文是zh-Hans)
timezone: 网站时区(Hexo 默认使用您电脑的时区,不用写)
关于 站点配置文件 中的其他配置可参考站点配置
2.菜单设置
菜单包括:首页、归档、分类、标签、关于等等
我们刚开始默认的菜单只有首页和归档两个,不能够满足我们的要求,所以需要添加菜单,打开 主题配置文件 找到Menu Settings
menu:
home: / || home //首页
archives: /archives/ || archive //归档
categories: /categories/ || th //分类
tags: /tags/ || tags //标签
about: /about/ || user //关于#schedule: /schedule/ || calendar //日程表
#sitemap: /sitemap.xml || sitemap //站点地图
#commonweal: /404/ || heartbeat //公益404
看看你需要哪个菜单就把哪个取消注释打开就行了;
关于后面的格式,以archives: /archives/ || archive为例:
|| 之前的/archives/表示标题“归档”,关于标题的格式可以去themes/next/languages/zh-Hans.yml中参考或修改
||之后的archive表示图标,可以去Font Awesome中查看或修改,Next主题所有的图标都来自Font Awesome。
3.Next主题样式设置
我们百里挑一选择了Next主题,不过Next主题还有4种风格供我们选择,打开 主题配置文件 找到Scheme Settings
Schemes
scheme: Muse
scheme: Mist
scheme: Pisces
scheme: Gemini
4种风格大同小异,本人用的是Gemini风格,你们可以选择自己喜欢的风格。
4.侧栏设置
侧栏设置包括:侧栏位置.侧栏显示与否.文章间距.返回顶部按钮等等
打开 主题配置文件 找到sidebar字段
sidebar:
Sidebar Position - 侧栏位置(只对Pisces | Gemini两种风格有效)
position: left //靠左放置
#position: right //靠右放置
Sidebar Display - 侧栏显示时机(只对Muse | Mist两种风格有效)
#display: post //默认行为,在文章页面(拥有目录列表)时显示
display: always //在所有页面中都显示#display: hide //在所有页面中都隐藏(可以手动展开)
#display: remove //完全移除
offset: 12 //文章间距(只对Pisces | Gemini两种风格有效)
b2t: false //返回顶部按钮(只对Pisces | Gemini两种风格有效)
scrollpercent: true //返回顶部按钮的百分比
5.头像设置
打开 主题配置文件 找到Sidebar Avatar字段
Sidebar Avatar
avatar: /images/header.jpg
这是头像的路径,只需把你的头像命名为header.jpg(随便命名)放入themes/next/source/images中,将avatar的路径名改成你的头像名就OK啦!
6.评论系统
| 推荐指数 | 优点 | 缺点 | |
|---|---|---|---|
| Valine | 4 | 每天30000条评论,10GB的储存 | 作者评论无标识 |
| 来必力/livere | 4 | 多种账号登录 | 评论无法导出 |
| 畅言 | 3 | 美观 | 必须备案域名 |
| gitment | 3 | 简洁 | 只能登陆github评论 |
| Disqus | 1 | 需要翻*墙 |
来必力
2.1. 登陆 来必力 获取你的 LiveRe UID。
2.2. 填写LiveRe UID到主题配置文件_config.yml
7.添加标签页
添加一个标签页面,里面包含您网站中的所有标签。参考链接
一个创建³³名为tags页面
hexo new page “tags”
编辑标签页,设置页面类型为tags。
title: All tags
date: 2014-12-22 12:39:04
type: “tags”
添加tags到主题配置文件_config.yml里:
menu:
home: /
archives: /archives
tags: /tags
详细解释:
8.添加分类页
添加一个分类页面,里面包含您网站中的所有分类。
一个创建³³名为categories页面
hexo new page “categories”
编辑分类页,设置页面类型为categories。
title: All categories
date: 2014-12-22 12:39:04
type: “categories”
添加 categories到主题配置文件_config.yml里:
menu:
home: /
archives: /archives
categories: /categories
详细解释:
参考截图:
9.添加萌萌哒宠物
具体参考官方文档:点击跳转
1.安装模块:
npm install –save hexo-helper-live2d
2.配置
请向Hexo的 _config.yml 文件或主题的 _config.yml 文件中添加配置.
示例:
1 | live2d: |
详解:
1 | live2d: |
3.模型
a. live2d_models子目录名称
- 在您博客根目录下创建一个 live2d_models 文件夹.
- 在此文件夹内新建名为 shizuku (模型名字)的子文件夹.
- 在这里应当有一个 .model.json 文件 (例如 shizuku.model.json)
- 将子文件夹的名称输入 _config.yml 的 model.use 中.
b. 相对于博客根目录的自定义路径
您可直接输入相对于博客根目录的自定义路径到 model.use 中.
示例: ./wives/wanko
c. npm 模块名(走这步就可以了)
现有模型:https://github.com/xiazeyu/live2d-widget-models
对应的模型图片:https://huaji8.top/post/live2d-plugin-2.0/
模型地址
npm install –save live2d-widget-model-xxx 来安装
然后你就可以通过向 model.use 键入包名 (live2d-widget-model-wanko) 来使用了.
10.首页阅读全文
Hexo 的 Next 主题默认是首页显示你每篇文章的全文内容,但这会使你的首页篇幅过于冗长,针对这个问题我们可以这么做:
用编辑器打开themes/next 目录下的_config.yml文件
找到代码:
auto_excerpt:
enable: false
length: 150
将enable的 false改成true,length可以设定文章预览的文本长度。
11.修改背景图片
在 themes/*/source/css/_custom/custom.styl 中添加如下代码:
// 添加背景图 bg.jpg为图片名称body{ background:url(/images/bg.jpg); background-size:cover; background-repeat:no-repeat; background-attachment:fixed; background-position:center;}
12.实现点击出现桃心效果
- 在/themes/*/source/js/src下新建文件click.js,接着把以下粘贴到click.js文件中。
代码如下:
1 | !function(e,t,a){function n(){c(".heart{width: 10px;height: 10px;position: fixed;background: #f00;transform: rotate(45deg);-webkit-transform: rotate(45deg);-moz-transform: rotate(45deg);}.heart:after,.heart:before{content: '';width: inherit;height: inherit;background: inherit;border-radius: 50%;-webkit-border-radius: 50%;-moz-border-radius: 50%;position: fixed;}.heart:after{top: -5px;}.heart:before{left: -5px;}"),o(),r()}function r(){for(var e=0;e<d.length;e++)d[e].alpha<=0?(t.body.removeChild(d[e].el),d.splice(e,1)):(d[e].y--,d[e].scale+=.004,d[e].alpha-=.013,d[e].el.style.cssText="left:"+d[e].x+"px;top:"+d[e].y+"px;opacity:"+d[e].alpha+";transform:scale("+d[e].scale+","+d[e].scale+") rotate(45deg);background:"+d[e].color+";z-index:99999");requestAnimationFrame(r)}function o(){var t="function"==typeof e.onclick&&e.onclick;e.onclick=function(e){t&&t(),i(e)}}function i(e){var a=t.createElement("div");a.className="heart",d.push({el:a,x:e.clientX-5,y:e.clientY-5,scale:1,alpha:1,color:s()}),t.body.appendChild(a)}function c(e){var a=t.createElement("style");a.type="text/css";try{a.appendChild(t.createTextNode(e))}catch(t){a.styleSheet.cssText=e}t.getElementsByTagName("head")[0].appendChild(a)}function s(){return"rgb("+~~(255*Math.random())+","+~~(255*Math.random())+","+~~(255*Math.random())+")"}var d=[];e.requestAnimationFrame=function(){return e.requestAnimationFrame||e.webkitRequestAnimationFrame||e.mozRequestAnimationFrame||e.oRequestAnimationFrame||e.msRequestAnimationFrame||function(e){setTimeout(e,1e3/60)}}(),n()}(window,document); |
- 在\themes*\layout_layout.swig文件末尾添加:
1 | <!-- 页面点击小红心 --> |
13.主页文章添加边框阴影效果
打开 themes/*/source/css/_custom/custom.styl ,向里面加代码:
1 | // 主页文章添加阴影效果 |
14.显示当前浏览进度
修改themes/*/_config.yml,把 false 改为 true:
1 | # Back to top in sidebar |
15.博客文章置顶
安装插件
1 | $ npm uninstall hexo-generator-index --save |
然后在需要置顶的文章的Front-matter中加上top即可:top值越大表示优先级越高
1 | --- |
设置置顶标志
打开:/themes/*/layout/_macro/post.swig插入以下代码即可:
1 | {% if post.top %} |
16.生成博文插入图片
参考:Nuub
用Typora编写Markdown的可以修改成这样就直接复制图片过去了
17.取消文章目录自动编号
修改主题配置文件那里的number为false
18.修改文章底部标签的图标
修改主题模板/themes/next/layout/_macro/post.swig,搜索 rel=”tag”>#,将 # 换成
19.静态资源压缩
在站点目录下:
1 | $ npm install gulp -g |
安装gulp插件:
1 | npm install gulp-minify-css --save |
在 Hexo 站点下新建 gulpfile.js文件,文件内容如下:
1 | var gulp = require('gulp'); |
只需要每次在执行 generate 命令后执行 gulp 就可以实现对静态资源的压缩,压缩完成后执行 deploy 命令同步到服务器:
1 | hexo g |
20.去掉图片边框
NexT主题默认会有图片边框,不太好看,我们可以把边框去掉。打开 themes\Next\source\css_custom\custom.styl,添加如下CSS代码:
1 | /* 去掉图片边框 */ |
21.添加 关于页面
hexo new page “about” 新建一个 关于我 页面。
主题的 _config.yml 文件中的 menu 中进行匹配
1 | menu: |
22.添加字数统计.阅读时长
统计插件
配置
NexT 主题默认已经集成了文章【字数统计】.【阅读时长】统计功能,如果我们需要使用,只需要在主题配置文件 _config.yml 中打开 wordcount 统计功能即可。如下所示:
1 | # Post wordcount display settings |
修改完成主题配置文件后,启动服务预览:
hexo server
访问 http://localhost:4000/ 链接,如果出现字数统计和阅读时长失效的情况,一般是因为没有安装 hexo-wordcount 插件,查看 Hexo 插件:
hexo –debug
安装
如果没有安装 hexo-wordcount插件,先安装该插件:
npm i –save hexo-wordcount
Node 版本 7.6.0 之前,请安装 2.x 版本 (Node.js v7.6.0 and previous) ,安装命令如下:
npm install hexo-wordcount@2 –save
显示文字
打开post.swig文件,路径如下:/themes/next/layout/_macro/post.swig
修改【字数统计】,找到如下代码:
1 | <span title="{{ __('post.wordcount') }}"> |
效果预览图:
23.添加社交
在主题配置文件找到social,添加需要的就可以,具体如下图
可以自定义图标,默认的图标都是从图标库自动匹配的,||后面的就是在图标库的图标名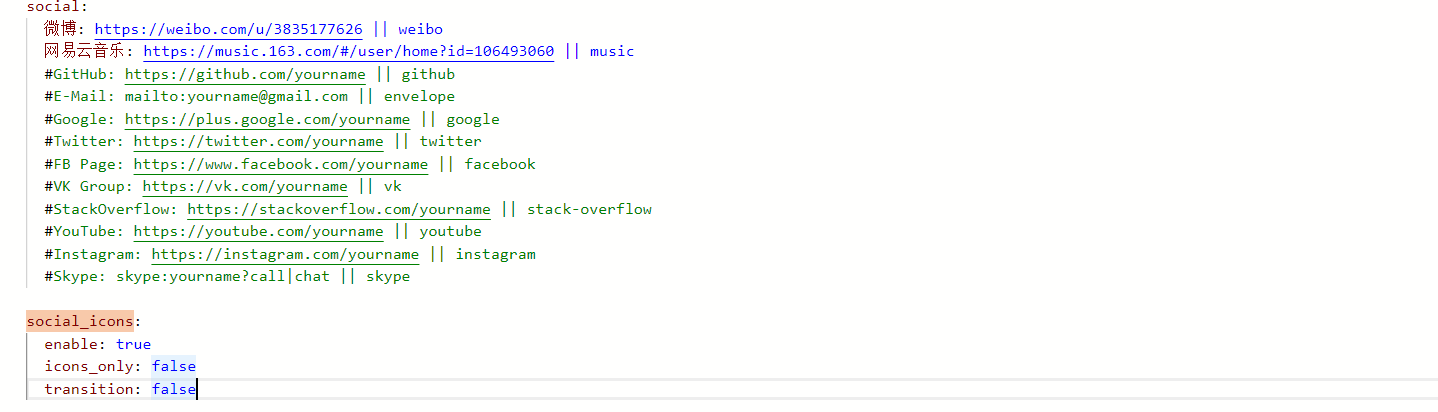
24.添加站内搜索
1、安装 hexo-generator-searchdb 插件
npm install hexo-generator-searchdb –save
2、打开 站点配置文件 找到Extensions在下面添加
搜索
search:
path: search.xml
field: post
format: html
limit: 10000
3、打开 主题配置文件 找到Local search,将enable设置为true
25.设置文字居中
这一行需要居中
设置方法:
这一行需要居中 注意:简书中此方法无效
26.点击爆炸效果
实现方法
跟那个红心是差不多的,首先在themes/next/source/js/src里面建一个叫fireworks.js的文件,代码如下:
1 | ;function updateCoords(e){pointerX=(e.clientX||e.touches[0].clientX)-canvasEl.getBoundingClientRect().left,pointerY=e.clientY||e.touches[0].clientY-canvasEl.getBoundingClientRect().top}function setParticuleDirection(e){var t=anime.random(0,360)*Math.PI/180,a=anime.random(50,180),n=[-1,1][anime.random(0,1)]*a;return{x:e.x+n*Math.cos(t),y:e.y+n*Math.sin(t)}}function createParticule(e,t){var a={};return a.x=e,a.y=t,a.color=colors[anime.random(0,colors.length-1)],a.radius=anime.random(16,32),a.endPos=setParticuleDirection(a),a.draw=function(){ctx.beginPath(),ctx.arc(a.x,a.y,a.radius,0,2*Math.PI,!0),ctx.fillStyle=a.color,ctx.fill()},a}function createCircle(e,t){var a={};return a.x=e,a.y=t,a.color="#F00",a.radius=0.1,a.alpha=0.5,a.lineWidth=6,a.draw=function(){ctx.globalAlpha=a.alpha,ctx.beginPath(),ctx.arc(a.x,a.y,a.radius,0,2*Math.PI,!0),ctx.lineWidth=a.lineWidth,ctx.strokeStyle=a.color,ctx.stroke(),ctx.globalAlpha=1},a}function renderParticule(e){for(var t=0;t<e.animatables.length;t++){e.animatables[t].target.draw()}}function animateParticules(e,t){for(var a=createCircle(e,t),n=[],i=0;i<numberOfParticules;i++){n.push(createParticule(e,t))}anime.timeline().add({targets:n,x:function(e){return e.endPos.x},y:function(e){return e.endPos.y},radius:0.1,duration:anime.random(1200,1800),easing:"easeOutExpo",update:renderParticule}).add({targets:a,radius:anime.random(80,160),lineWidth:0,alpha:{value:0,easing:"linear",duration:anime.random(600,800)},duration:anime.random(1200,1800),easing:"easeOutExpo",update:renderParticule,offset:0})}function debounce(e,t){var a;return function(){var n=this,i=arguments;clearTimeout(a),a=setTimeout(function(){e.apply(n,i)},t)}}var canvasEl=document.querySelector(".fireworks");if(canvasEl){var ctx=canvasEl.getContext("2d"),numberOfParticules=30,pointerX=0,pointerY=0,tap="mousedown",colors=["#FF1461","#18FF92","#5A87FF","#FBF38C"],setCanvasSize=debounce(function(){canvasEl.width=2*window.innerWidth,canvasEl.height=2*window.innerHeight,canvasEl.style.width=window.innerWidth+"px",canvasEl.style.height=window.innerHeight+"px",canvasEl.getContext("2d").scale(2,2)},500),render=anime({duration:1/0,update:function(){ctx.clearRect(0,0,canvasEl.width,canvasEl.height)}});document.addEventListener(tap,function(e){"sidebar"!==e.target.id&&"toggle-sidebar"!==e.target.id&&"A"!==e.target.nodeName&&"IMG"!==e.target.nodeName&&(render.play(),updateCoords(e),animateParticules(pointerX,pointerY))},!1),setCanvasSize(),window.addEventListener("resize",setCanvasSize,!1)}"use strict";function updateCoords(e){pointerX=(e.clientX||e.touches[0].clientX)-canvasEl.getBoundingClientRect().left,pointerY=e.clientY||e.touches[0].clientY-canvasEl.getBoundingClientRect().top}function setParticuleDirection(e){var t=anime.random(0,360)*Math.PI/180,a=anime.random(50,180),n=[-1,1][anime.random(0,1)]*a;return{x:e.x+n*Math.cos(t),y:e.y+n*Math.sin(t)}}function createParticule(e,t){var a={};return a.x=e,a.y=t,a.color=colors[anime.random(0,colors.length-1)],a.radius=anime.random(16,32),a.endPos=setParticuleDirection(a),a.draw=function(){ctx.beginPath(),ctx.arc(a.x,a.y,a.radius,0,2*Math.PI,!0),ctx.fillStyle=a.color,ctx.fill()},a}function createCircle(e,t){var a={};return a.x=e,a.y=t,a.color="#F00",a.radius=0.1,a.alpha=0.5,a.lineWidth=6,a.draw=function(){ctx.globalAlpha=a.alpha,ctx.beginPath(),ctx.arc(a.x,a.y,a.radius,0,2*Math.PI,!0),ctx.lineWidth=a.lineWidth,ctx.strokeStyle=a.color,ctx.stroke(),ctx.globalAlpha=1},a}function renderParticule(e){for(var t=0;t<e.animatables.length;t++){e.animatables[t].target.draw()}}function animateParticules(e,t){for(var a=createCircle(e,t),n=[],i=0;i<numberOfParticules;i++){n.push(createParticule(e,t))}anime.timeline().add({targets:n,x:function(e){return e.endPos.x},y:function(e){return e.endPos.y},radius:0.1,duration:anime.random(1200,1800),easing:"easeOutExpo",update:renderParticule}).add({targets:a,radius:anime.random(80,160),lineWidth:0,alpha:{value:0,easing:"linear",duration:anime.random(600,800)},duration:anime.random(1200,1800),easing:"easeOutExpo",update:renderParticule,offset:0})}function debounce(e,t){var a;return function(){var n=this,i=arguments;clearTimeout(a),a=setTimeout(function(){e.apply(n,i)},t)}}var canvasEl=document.querySelector(".fireworks");if(canvasEl){var ctx=canvasEl.getContext("2d"),numberOfParticules=30,pointerX=0,pointerY=0,tap="mousedown",colors=["#FF1461","#18FF92","#5A87FF","#FBF38C"],setCanvasSize=debounce(function(){canvasEl.width=2*window.innerWidth,canvasEl.height=2*window.innerHeight,canvasEl.style.width=window.innerWidth+"px",canvasEl.style.height=window.innerHeight+"px",canvasEl.getContext("2d").scale(2,2)},500),render=anime({duration:1/0,update:function(){ctx.clearRect(0,0,canvasEl.width,canvasEl.height)}});document.addEventListener(tap,function(e){"sidebar"!==e.target.id&&"toggle-sidebar"!==e.target.id&&"A"!==e.target.nodeName&&"IMG"!==e.target.nodeName&&(render.play(),updateCoords(e),animateParticules(pointerX,pointerY))},!1),setCanvasSize(),window.addEventListener("resize",setCanvasSize,!1)}; |
打开themes/next/layout/_layout.swig,在上面写下如下代码:
1 | {% if theme.fireworks %} |
打开主题配置文件,在里面最后写下:
1 | # Fireworks |
27.设置文章加密访问
这里使用第三方插件Hexo-Blog-Encrypt
1)首先,你需要在站点 _config.yml 中启用该插件
1 | # Security |
2)给文章添加密码:
1 |
|
password: 是该博客加密使用的密码
abstract: 是该博客的摘要,会显示在博客的列表页
message: 这个是博客查看时,密码输入框上面的描述性文字
对 TOC 进行加密
如果你有一篇文章使用了 TOC,你需要修改模板的部分代码。这里用 landscape 作为例子:
你可以在 hexo/themes/landscape/layout/_partial/article.ejs 找到 article.ejs。
然后找到 <% post.content %> 这段代码,通常在30行左右。
使用如下的代码来替代它:
1 | <% if(post.toc == true){ %> |
28 设置首页缩略图
有两种方法,自行选择。
1 |
|
- 遇见西门
- JuLi距离
- Next官方文档
- Hexo瞎折腾系列
- NIkkkki睡不醒
- 二次元模型
- https://l2dwidget.js.org/dev.html
- hexo-helper-live2d
- live2d-widget.js
29 ECharts
常规做法
你可能也看到了,上面的图表在我的hexo搭建的博客中可以完美展示。这个是怎么做到的呢?
首先,如果你用的是Yelee或者类似的主题,你应该可以很简单地直接参照这个博客去做。
我也是在看上面的博客的时候遇到了问题,如果我用Yelee主题的话是很简单的可以实现上面的效果的,但是我现在更喜欢的是现在的Next主题。这两个主题的结构不一样。
安装上文说的在所用主题目录下layout_partial文件夹中不存在,更不存在head.ejs
Next目录:
Yelee目录:
Next主题做法
由此看出,如果你和我一样使用Next主题的话上面的教程不能用。需要像我这样做:
下载js
首先下载ECharts的js文件:ECharts
把js文件放到next主题的\source\js\src目录下:
js文件的引用
然后在next\layout\文件夹下,找到_layout.swig文件,并用文本查看器打开,在下面代码:
1 | <main id="main" class="main"> |
的前面添加:
1 | <!-- echarts --> |
保存退出。
安装hexo-tag-echarts插件
在博客站点目录下执行npm install hexo-tag-echarts –save。
使用范例
可以简单的找个例子试下,把下面代码放到一个博客的markdown文件中即可。注意不要使用代码块!!
1 | {% echarts 400 '81%' %} |
之后你就应该能看到我的上面的ECharts图了。